HDInsight the Hadoop cloud offering from Windows Azure is a great way to use BigData as a service solutions, but there is more. With the general availability of HDP 2.2 announced this week it is great opportunity to extend the existing HDP Vagrant collection with the Windows Azure provider. In this blog post I want to demonstrate the needed steps to quickly setup a 6 node Hadoop cluster using the provided script. Except for preliminary setup steps it only takes a little adjustment of the Vagrantfile and two commands to setup the whole cluster.
Our 5 node cluster will consist of two master nodes, three data nodes, and one edge node with the Apache Knox gateway installed among other client libraries. Let’s jump in right now.
Setting Up Windows Azure
1. Subscription
Running services on Azure requires a subscription account. Any Windows Live account can be used to signup for the free trial subscription easily.
2. Management Certificate
Once signed up you might right away go ahead an create a management certificate for your account which you’ll need to use the Azure API. The certificate is created locally on your machine then uploaded to the account using the management portal. With the following instructions a certificate valid for the next year can be created.
$ openssl req -x509 -nodes -days 365 -newkey rsa:1024 -keyout ~/.ssh/azure_mgnt.pem -out ~/.ssh/azure_mgnt.pem
$ openssl x509 -inform pem -in ~/.ssh/azure_mgnt.pem -outform der -out ~/.ssh/azure_mgnt.cer
The azure_mgnt.cer file is uploaded to the portal, while the azure_mgnt.pem file is being used for access.
Hint: Try to use no password for the certificate so you can use it in an automated fashion, obviously this is considered less secure. You should always set the correct access rights for any certificate, which would be 0400 ideally.
Use the management portal to deposit the certificate with your account. Go to the Settings tab choosing Management Certificatesm shown below:
 5. Creating a Machine User Certificate

Running a virtual machine requires a user account. Azure uses same as with the management account a public/private key approach to grant access to the virtual machines for you. Therefor in addition to the management certificate you would also need to create a user certificate for your virtual machine user (by default azureuser). You can create the credentials like this:
$ ssh-keygen -t rsa -f ~/.ssh/azure.id
$ openssl req -x509 -days 3650 -new -key azure.id -out azure.pem
The azure.pem file is uploaded to the machines, while the key file is used for accessing the virtual machines. Here you should also think about using a password or not for the generated key.
4. Client Access (optional)
The Azure cross platform client based on NodeJS is a good way to interact with your subscription from command line. This step is optional as we don’t be using the client through out this post. But in any case you should go ahead and set it up. As you won’t be able to use your Windows Live account for this client you need to navigate to the Directory Service tab in the management portal. Under the default directory service you ought to be able to create a management account. Use this to login when using the cross platform client. Learn more here.
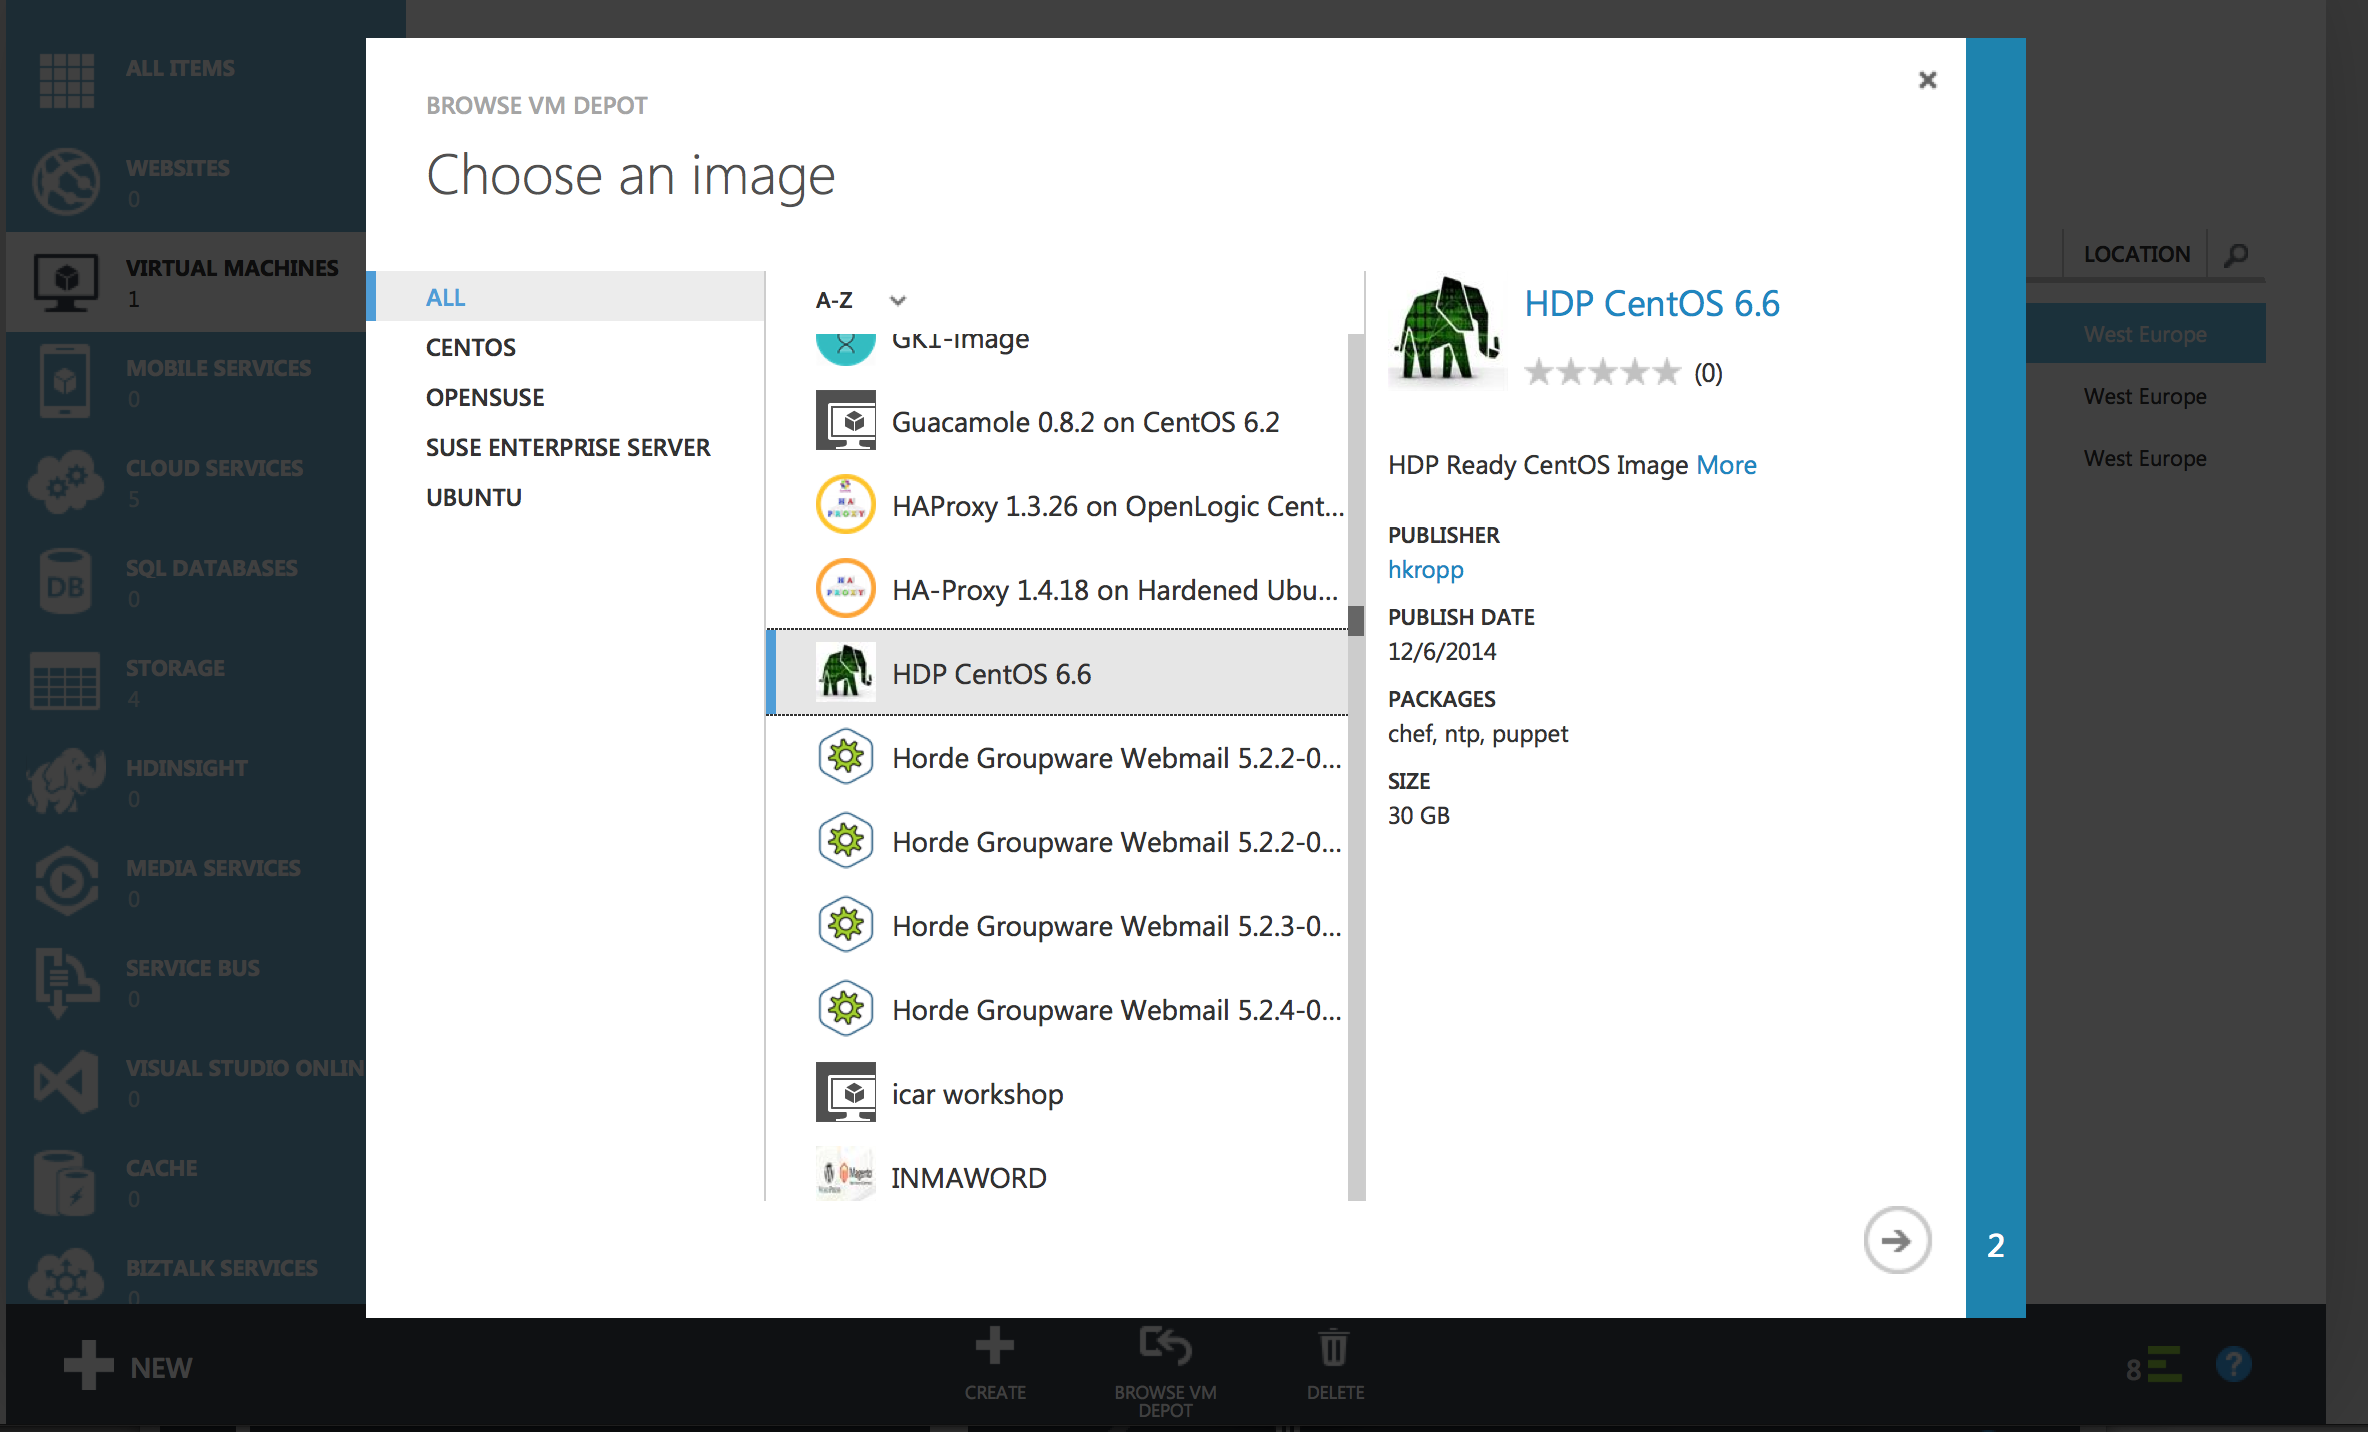
5. Import the HDP Ready Image
The last step to be able to try the provided setup is to import the community image I provide for this setup The HDP CentOS 6.6 image you’ll find in the VMDepot collection has Puppet and Chef preinstalled for provisioning. In addition it also already has ntp installed and sudoers are not required a ptty, this is needed to be able to provision the machines correctly using Vagrant.
Under the Virtual Machines go to images and click Browse Images, you’ll be able to select the HDP CentOS 6.6 image as shown below. Import the image as described below. After you succeeded with this import you should be able to use the image name in the Vagrantfile and provision all machines with this images. You can read more here about how this image was created.

Using Vagrant Azure
With the preliminary steps described above we are ready to create our HDP cluster on Windows Azure. To get started you should simply download or checkout the most recent version of the HDP collection from GitHub here.
Under the folder azure you find the demonstration setup hdp22-n6-centos-puppet that is used to setup a six node cluster based on CentOS and provisioned using Puppet. You will need to change the default parameters given in the Vagrantfile to match you account setup on Azure.
You need to provide the management credentials to be able to use the Azure API for setup:
azure.mgmt_certificate = '/Users/yourname/.ssh/azure_mgnt.pem'
azure.mgmt_endpoint = 'https://management.core.windows.net'
azure.subscription_id = '1111-dddv4-4dss-334c-ddfadsafadsf'
Provide the storage account you will use to hold the disks of your VMs. This needs to be the same storage account you prior used to import the image. Provide the name of the image in the same manner:
azure.storage_acct_name = 'hpdimages'
azure.vm_image = 'HDP-CentOS-6-6'
Next you will need to configure each virtual machine that gets created. Partly this is achieved by defining each node in an array at the beginning of the script.
We’ll use a non standard user to access the machines. All other configurations should be straight forward:
azure.vm_size = opts[:vm_size]  # Allowed values are 'ExtraSmall,Small,Medium,Large,ExtraLarge,A6,A7' http://msdn.microsoft.com/en-us/library/azure/dn197896.aspx
azure.vm_user = 'hdpuser'
azure.vm_name = opts[:name].to_s
azure.cloud_service_name = "%s-%s" % [CLOUD_SERVICE_NAME, opts[:manifest_name]]
azure.vm_location = 'West Europe'
Remember that we’ve setup private/public key authentication to access virtual machines in Windows Azure? Well we would have to provide Vagrant with the information where to find them, so that the machines get provisioned correctly.
config.ssh.private_key_path = '/Users/yourusername/.ssh/azure.key'
....
azure.ssh_private_key_file = '/Users/yourusername/.ssh/azure.key'
azure.ssh_certificate_file = '/Users/yourusername/.ssh/azure.pem'
Now we can run vagrant up to create the virtual machines running on Azure. Unfortunately the vagrant-azure plugin still has a bug which prohibits the setup of the machines in parallel. The reason for this is that all the machines create the same disk by name. The machines get created in the same minute which is the smallest variation the automatic disk name convention currently allows. So to get started run:
vagrant up --provider=azure --no-parallel
Provision HDP Using Ambari Blueprints
For us to reach the point of having a full provisioned HDP cluster what is left to do is install the wanted services. In order to achieve this quite conveniently we are going to elaborate on Ambari blueprints. In the blueprint.json file are five host groups which we can use to achieve our preferred cluster setup. What is important for you to change is the host mapping found in hostmapping.json. You would need to change the mapping based on the names you gave the instances during setup. Check your Vagrantfile for details. For convenience the curl requests to initialize the setup are put in basic install_blueprint.sh script file. If you plan to use that you would also have to change the name of the Ambari host according to the name you provided during setup.
At this point, if you’ve made it to here without hitting any major roadblocks, you should be able to quickly launch your HDP 2.2 cluster using Windows Azure cloud. Most of what is described here is quite easy, but unfortunately it is in the nature of complex systems that details matter, and tend to break.

Try Now: HDP 2.2 on Windows Azure http://t.co/4qsEtyHaRy
LikeLike
Von @jonbros: Try Now: HDP 2.2 on Windows Azure http://t.co/FPoV8VJdlC #IronBloggerMUC
LikeLike